Adding 4Comply to Existing Forms


Picture this: you’re a developer working at a successful company. You played a huge role in developing a fantastic website, online forms, landing pages, and of course, a personalized user experience. You also connected your website, marketing, and sales systems together to streamline data flow and increase revenue. You’re great at your job.
Today, you meet with your manager and learn you’re being given a new development project. But this isn’t the same kind of project you’re used to. Now you have to bring the website, forms, and everything else you helped create into compliance with privacy laws. Even if you aren’t an expert on data privacy, you know this is going to take a lot of work. How do you get started?
Adding 4Comply to Existing Forms
Rebuilding all your assets from the ground up will cost time and money that you don’t have. Fortunately, you don’t have to do this. We have a system that can help you bring everything up to date much faster (and at a lower cost): 4Comply.
4Comply is a privacy compliance API service that enables developers to incorporate privacy compliance into their existing forms and systems. The process is designed to be as quick and straightforward as possible. In this article, we will show how you can begin adding 4Comply to existing forms and streamline your update process.
Input Values
The fields Consent Code, Processing Purpose, Consent Type, and System are how you tell 4Comply what the customer gave consent to and where it originated. The exact values depend on how you set up 4Comply. Usually, the fields contain these values:
Consent Code="Yes" (The person gave some type of consent)
Processing Purpose="Event Registration with Consent" (the purpose of the processing that needs to take place)
Consent Type="Communicate Electronically" (What type of consent they gave).
Note: Privacy laws and business goals differ, so sometimes a company’s attorneys will require different types of consent. But most companies only need consent to communicate electronically. We will stick with this example in this article.
System="Eloqua" (Name of the system where data originated).
Note: The system value is optional but highly recommended. If you leave this field blank, 4Comply will fill it in automatically with “default.” The system must also match a value in the system table under configuration in the 4Comply Dashboard. You can review a list of 4Comply’s default processing purposes in the documentation.
Next, let’s explore further by creating a developer account and submitting your first request using the interactive API Reference.
Create & Configure your 4Comply Developer Account
- Go to the 4Comply website.
- From the top navigation bar, select Developer, then select Create Free Developer Account.
- Complete the form with your contact details and submit.
- Create your username and password.
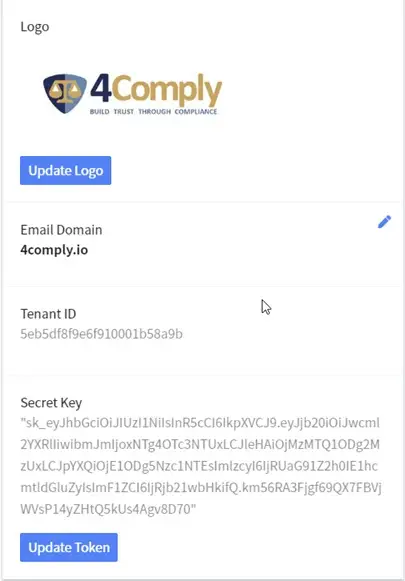
- On the main 4Comply Dashboard, click on Settings in the upper-right corner.
- Your Tenant ID and Secret Key are displayed on the screen. Save both of these – you’ll need them soon.
Submit Your First Request Using the API Reference
Now, you need to test your new setup by submitting a dummy request. Here’s what you need to do:
- Go the API reference by accessing the API Documentation.
- From within the 4Comply Dashboard, select Documentation in the upper right, or navigate directly to the documentation homepage.
- Select API Reference.
- Select Consent & Digital Citizens.
- Select Add consent for a user.
- Open Select Regulations & Consent. You should see details for the request body and responses.
- Scroll down and select Send a Test Request.
For this example, we’re going to submit a request for a user in California.
- Under Send a Test Request, select Headers.
- Add the following required values:
- Insert your tenant_id
- Set geo_override = CA
- Set geo_type = state
Note: For most regulations, “geo-type” applies to an entire country or group of countries. The exception is within the United States, which currently has no federal privacy law. For all other nations, the geo_type should be “country.”
Your page should look like this:

- Now configure the body for your request. To speed things up, simply copy and paste the information below.
{
	"email_address": "youremail@domain.com",
	"consent_code": "yes",
  	"processing_purpose": "Event Registration with Consent",
	"system": "Eloqua",
	"business_unit": "Acme Widgets"
}
Your screen should now look like this:
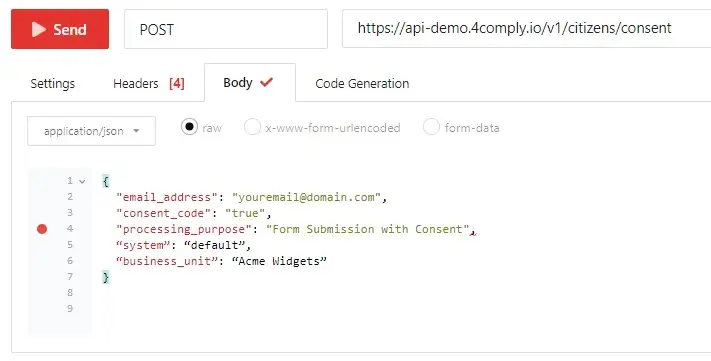
- When ready, click Send to post your request. If everything worked as expected, your page should look similar to this:
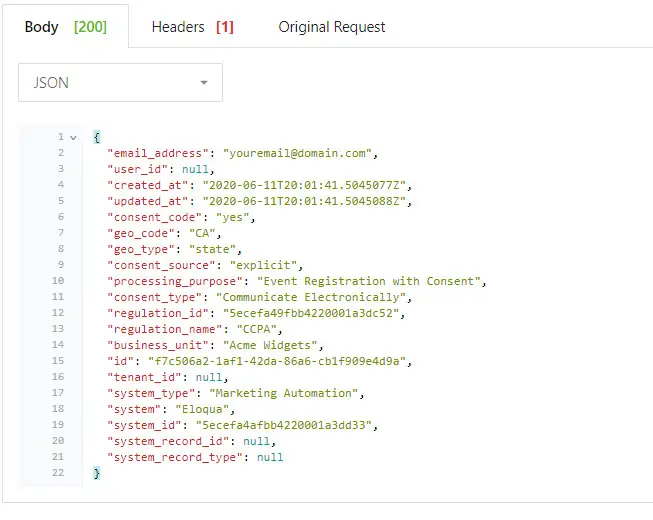
Outstanding! You’ve submitted your first consent record. Now, let’s return to the 4Comply Dashboard and take a look.
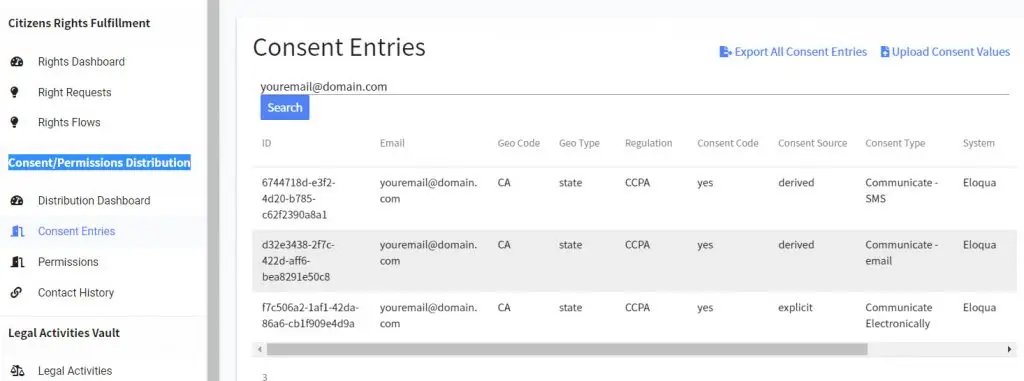
Under Consent/Permissions Distribution, select Consent Entries. Make sure you can see your dummy consent entry in the list.
Working with 4Comply
Congratulations! You’ve successfully created a new 4Comply Developer Account and submitted your first consent record. You’re well on your way to streamlining your company’s privacy management. From here, you can continue adding 4Comply to existing forms and bring the rest of your system up to speed.
If you still have questions, take a look at the rest of the 4Comply Documentation for help with common issues. For a free demo of what else you can do with a developer’s account, get in touch with us today.


